Product Information
Extreme Bull Commander GT Pro/GT Pro+ LED Accent Light Kit
Brighten up your ride!
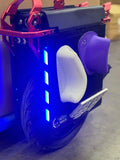
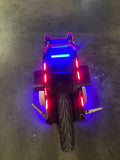
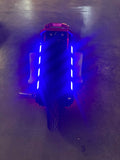
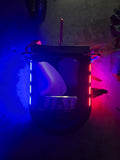
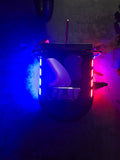
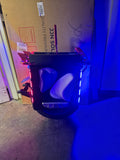
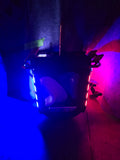
The Extreme Bull Commander GT Pro and GT Pro+ are top-tier wheels, but we’re taking them further with LED Accent Lights. Inspired by photos circulating in the electric unicycle community, we've designed a unique LED strip light kit to enhance your wheel's aesthetics and visibility.
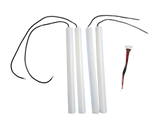
What’s Included:
- 1 Rear Left Red LED Strip (12" wire)
- 1 Rear Right Red LED Strip (12" wire)
- 1 Front Left Blue LED Strip (18" wire)
- 1 Front Right Blue LED Strip (18" wire)
- 1 JST Female to 4x JST Male Quad "Y" Splitter
Video Instructions for install here
Note: To power the LED strips, you’ll need to disconnect the USB-A and USB-C Hidden charger in the back of the wheel by the charge port. You can leave it installed, but you can't power it with the LEDs on —there is not enough current for both.
Installation Options:
1. Professional Install
($150 Labor + $150 Kit = $300 Total)
For local customers, or before your GT Pro ships out, we'll install the LED kit for you. This includes drilling four holes in the top plastic cover, mounting the lights securely with Kafuter Silicone Black glue, and wiring the splitter into the auxiliary board.
2. DIY Install – $150
This kit is perfect for those who already have silicone glue and drill bits (or a Dremel). It includes the four LEDs and the 4-way splitter, but nothing else.
Want to Keep Your Phone Charger?
You can use a center-off toggle switch to toggle between charging your phone and lighting up your LEDs. This requires drilling, soldering, and installing the switch yourself, or we can handle the install for an additional $150. Save money by doing it yourself!
Purchase the center-off toggle switch here.
Quick Installation Guide:
- Remove the trolley handle.
- Unscrew the top cover using a2.5mm Allen driver.
- Use a 5mm drill bit to make four holes for the LED strips.
- Install the LEDs:
- Rear red strips in the back
- Front blue strips in the front
- Secure the LED strips in place with silicone glue.
- Unplug the 2-pin JST connector from the rear aux board (this powers your phone charger).
- Install the Quad JST splitter (1 female, 4 male).
- Feed the LED JST connectors through the new holes.
- Add silicone glue around the holes after the connectors pass through.
- Reassemble everything and go ride in style!
If you need assistance or feedback on installation, call us at (415)-237-1761 or email us at Support@alienrides.com Feel free to send us pictures or questions, and we’ll update instructions for the next rider!
Why choose Alien Rides?
- ➔ Free Alien Rides sticker with every vehicle purchase.
- ➔ We are able to ship PEVs and parts internationally to keep you rolling.
- ➔ Our unique rides have competitve pricing, great value, and providing amazing fun.
- Choosing a selection results in a full page refresh.
- Press the space key then arrow keys to make a selection.
- Use left/right arrows to navigate the slideshow or swipe left/right if using a mobile device


